|
For a great many years I've had a PCM WAV file writer which is super duper simple (<20 LoC). I recently came across a git repo where somebody made a super high quality ADPCM encoder called ADPCM-XQ (stands for Xtreme Quality ADPCM Encoder/Decoder). I've looked at that code, re-wrote it to single file STB style, and greatly improved the algorithm it uses, fixed some bugs it had in the algorithms, etc... Namely compared to the original adpcm-xq, for the same quality as adpcm-xq it is lots faster - as well as it now includes a non-greedy search which further improves ADPCM quality. This improved speed is in part due to an improved search function around the current heuristic choice. The new slow mode is similar in speed to adpcm-xq, while having ~20% improved error per sample. First some examples. Uncompressed PCM: (0 error per sample) Fastest ADPCM encode configuration: (1201 error per sample) Fast ADPCM encode configuration: (1196 error per sample, similar quality to adpcm-xq) Slow ADPCM encode configuration: (1007 error per sample) Usage is something like: jo_write_wav_adpcm_slow("adpcm_slow.wav", num_channels, 44100, samples, num_samples); You can grab the code here:
1 Comment
Quality here is just incredible IMO. This is using a GAN so its generating details like brush strokes and other minor details that don't actually exist in the source DVD material into what it thinks the original material looked like - and the results are stunning. I wish I could show you all the entire film, but can't of course. Instead I give you a 30s clip. Behold! I wanted to write a blog post about an unusual usage of cross products. Namely, that you can take two points and cross them together to get a line, and take two lines and cross product them to get the intersection point -- and this works in 3D too! Cross product 3 vectors and you get the plane that it represents, cross product 3 planes and get the point they intersect at!
I learned about this a great many years ago when learning about Computer Vision techniques for Epipolar Geometry and solving for the Essential Matrix. Where in epipolar geometry, a pixel in one view is a line in another view, and given a bunch of corresponding points you can calculate the Essential Matrix with the help of a cross product matrix. This blog post is not about that specifically, but bringing this idea over to computer graphics generally. First in 2D where you have points and lines. Lets say you have 2 points p0(x,y) and p1(x,y). You first make them into 3D points by adding a 1. Not going to explain why you do that right now as that would just confuse the point. Sufficed to say though, p0(x,y,1) and p1(x,y,1). Then you perform a 3D cross product of those points cross3D(p0,p1) and you get... the line equation they represent as the solution. So, the orientation of the line (x,y), and the offset from the origin (z). One thing to note though that it is not normalized. So most of the time you want to take an additional step where you take the length of (x,y) and normalize the line equation such that |(x,y)| == 1. So... (x,y,z) = (x,y,z)/|(x,y)|. Then, you can find the intersection point of two line equations by doing a 3D cross product of those two lines! So cross3D(line0,line1) = point of intersection. Note: the intersection point is unnormalized, so you have to divide by Z. And of course this also works in 3D, where you have three 3D points. p0(x,y,z), p1(x,y,z), p2(x,y,z). Next up, you guessed it, you add a 1 as the W coordinate. so those points then become p0(x,y,z,1), p1(x,y,z,1), p2(x,y,z,1). Then you cross product those three 4D points together to get the plane equation they represent! planeEquation = cross4D(p0,p1,p2). Again th0ugh, this result is unnormalized, so you probably want to normalize the length via [x,y,z,w]/|[x,y,z]| And of course if you have 3 plane equations, you can cross product them and get the point they intersect at! point = cross4D(plane0,plane1,plane2). Note: the intersection point is unnormalized, so you have to divide by W. For easy reference, the calculation for a 4D cross product is specified as thus... void cross4D(const float v1[4], const float v2[4], const float v3[4], float result[4]) { result[0] = v1[1]*(v2[2]*v3[3]-v3[2]*v2[3])-v1[2]*(v2[1]*v3[3]-v3[1]*v2[3] )+v1[3]*(v2[1]*v3[2]-v3[1]*v2[2]); result[1] = v1[0]*(v3[2]*v2[3]-v2[2]*v3[3])-v1[2]*(v3[0]*v2[3]-v2[0]*v3[3])+v1[3]*(v3[0]*v2[2]-v2[0]*v3[2]); result[2] = v1[0]*(v2[1]*v3[3]-v3[1]*v2[3])-v1[1]*(v2[0]*v3[3]-v3[0]*v2[3])+v1[3] *(v2[0]*v3[1]-v3[0]*v2[1]); result[3] = v1[0]*(v3[1]*v2[2]-v2[1]*v3[2])-v1[1]*(v3[0]*v2[2]-v2[0]*v3[2])+v1[2]*(v3[0]*v2[1]-v2[0]*v3[1]); } and of course for 3D it is... void cross3D(const float v1[4], const float v2[4], float result[4]) { result[0] = v1[1]*v2[2] - v1[2]*v2[1]; result[1] = v1[2]*v2[0] - v1[0]*v2[2]; result[2] = v1[0]*v2[1] - v1[1]*v2[0]; } Its pretty useful or at least I find it useful to know this trick. I bet you will too! For educational purposes, this is being posted as a test of the real-time SRNN from the prior blog post. Everything is pretty decent - and this version again only looks at a frame at a time and doesn't consider past or future frames for the super-resolution (thus vast room for improvement). It has issues where it magnifies/interprets DCT artifacts as meaningful - but I suppose that's to be expected. Garbage in -> Garbage out. Ideally you would use this with uncompressed data. In theory you could train a NN to remove the DCT artifacts before processing or maybe do an all-in-one - though that's probably a diminishing returns kind of scenario. The original file incase the host re-encodes it in less than 4k...
The following AI Image Upscaler is made from a single file deep neural network library (jo_nn.h) - and will have the ability to ship to many common user targets (CPU/GLES/OpenGL/Vulkan/DX11/DX12/Metal). The plan is to release jo_nn.h once its more feature complete with regards to the production targets. Currently, CPU/GLES/WebGL/OpenGL/Vulkan is in good shape.
Until the release, an example output of image super resolution... 
Initializing... orThis is an article going over the technique to compress index buffers presented in my 2007,2008 presentations in more detail here.
Update: Fixed some bugs in my pseudo code. Also important to point out that your choice of index buffer optimizer greatly affects the effectiveness of this technique. Hence, look for a future post where I talk about that a bit. The process is as follows: First clean up the data... 1) Optimize the index buffers for cache coherency (another article on this later eventually, there's better ways than the typical methods) 2) Remove degenerate triangles (triangles with two or more indexes which are identical) 3) Remove duplicate triangles (triangles which occur more than once in the same index buffer, even if in different orders) 4) Order the vertexes such that they appear in the same order as the index buffer itself. The next step we make note that each triangle is typically re-using many elements of the previous triangle - so don't repeat yourself! The most common patterns occur in triangle fans and triangle strips which the index buffer optimizer creates in abundance. This usually has two repeating indexes, and one new index. There are some other cases with only two new indexes and such, but they are rare enough that we just escape all other cases to 3 new indexes. Additionally, we can losslessly rotate the indexes of the triangle to reduce the set of possibilities we need to encode. So we in effect create a 2 bit "repeat table", where we have an entry per triangle which describes the most common repeating patterns - and also creating a new index buffer which has those repeats omitted. For the 2 bit table, each value would mean 0 == first index same as last triangle's first index, second index same as last triangle's third index. 1 = = first index same as last triangle's third index, second index same as last triangle's second index. 2 == first index same as last triangle's second index, second index same as last triangle's first index. 3 == escape to encode all 3 indexes as if not repeated. In code this would be something like: // need a 2-bit entry for each triangle, except the first one which is assumed to be "3" char *repeat_table = (char*)malloc(num_indexes/3-1); char *rptbl = repeat_table; // the 2-bit repeat table, in bytes. entropy coder will do the right thing later. int *unq_idxs = unique_index_buffer; int *idxs = index_buffer; int * idxs_end = index_buffer + num_indexes; // First triangle is always there. *unq_idxs++ = *idxs++; *unq_idxs++ = *idxs++; *unq_idxs++ = *idxs++; for(; idxs < idxs_end; idxs+=3) { int *prev_tri = idxs-3; bool is_idx_old[3] = {false}; int num_old_idxs = 0; for(int j = 0; j < 3; ++j) { if(idxs[j] == prev_tri[0] || idxs[j] == prev_tri[1] || idxs[j] == prev_tris[2]) { is_idx_old[j] = true; ++num_old_idxs; } } // Previous cleanups should guarantee that degenerate triangles do not happen. assert(num_old_idxs != 3); // If we have less than 2 index repeats, then just encode an escape into the repeat table. if(num_old_idxs < 2) { memcpy(unq_idxs, idxs, sizeof(*idxs)*3); unq_idxs += 3; *rptbl++ = 3; } // Rotate the triangle to match one of the encoding if possible. // We want the two index repeats in the first two indexes of this triangle. while(!is_idx_old[0] || !is_idx_old[1]) { // Rotate the triangle int tmp = idxs[0]; memmove(idxs, idxs+1, sizeof(*idxs)*2); int btmp = is_idx_old[0]; memmove(is_idx_old, is_idx_old+1, sizeof(*is_idx_old)*2); } if(idxs[0] == prev_tri[0] && idxs[1] == prev_tri[2]) { *unq_idxs++ = idxs[2]; *rptbl++ = 0; continue; } if(idxs[0] == prev_tri[2] && idxs[1] == prev_tri[1]) { *unq_idxs++ = idxs[2]; *rptbl++ = 1; continue; } if(idxs[0] == prev_tri[1] && idxs[1] == prev_tri[0]) { *unq_idxs++ = idxs[2]; *rptbl++ = 2; continue; } memcpy(unq_idxs, idxs, sizeof(*idxs)*3); unq_idxs += 3; *rptbl++ = 3; } The next step is to notice that the indexes which are left are typically sequential (0,1,2,3,4,5,6,7,8,etc) as we re-ordered the vertex buffer to specifically be that way up-front. We can encode that explicitly with a 1-bit table which represents that... 0 == not sequential 1 == sequential code for that would look something like... int num_unique_indexes = unq_idxs - unique_index_buffer; char *chaos_index_buffer = (char*)malloc(num_unique_indexes); // maximum possible size char *chaos_idxs = chaos_index_buffer; char *chaos_bits = (char*)malloc(num_unique_indexes); for(int i = 0, j = 0; i < num_unqiue_indexes; ++i) { if(unqiue_index_buffer[i] == j) { chaos_bits[i] = 1; ++j; } else { chaos_bits[i] = 0; *chaos_idxs++ = unique_index_buffer[i]; } } Next up in the compression is to notice that the difference in numbers is typically small and can be represented in a small number of bits by delta encoding. Word of warning though, that this was built in the time of SPUs where you had to chunk your data up - as such sometimes depending on your data, that the deltas encoded in the following may be not worth the effort. I would bet though that there would be some on average gain though for most uses. int num_chaos_indexes = chaos_idxs - chaos_index_buffer; // Delta-encode the indexes for(int i = num_chaos_indexes-1; i >= 1; --i) { chaos_index_buffer[i] -= chaos_index_buffer[i-1]; } Since the values can go positive or negative, you next need to shift the data to all positive. // First find the min value int min_idx = INT_MAX; for(int i = 0; i < num_chaos_indexes; ++i) { min_idx = min_idx < chaos_index_buffer[i] ? min_idx : chaos_index_buffer[i]; } // Then shift it up so its 0 based. for(int i = 0; i < num_chaos_indexes; ++i) { chaos_index_buffer[i] -= min_idx; } Finally, you need to encode the following data... 1) min_idx 2) chaos_bits 3) chaos_index_buffer 4) repeat_table and you have a few choices for doing that. 1) You could just throw it at Kraken/Zip and let it handle all the heavy lifting. 2) You could just pack the data straight forward like. min_idx is 4 bytes (or 2 bytes if this is known 16-bit index buffer) repeat_table is 2-bits per entry chaos_bits is 1 bit per entry chaos_index_buffer is some number of bits, typically less than a full 16bits or 32bits per entry - so you can just find the minimum number of bits it can fit in and encode that directly. Obviously, Kraken/Zip is probably going to get you the biggest wins, but for a higher overall computational cost vs bit unpacking. When Kraken encoding, its probably beneficial to split the high and low bytes so that the compression doesn't have to do any heaving lifting there (high bytes should be almost always zero). For now I leave the decoding of the data as an exercise for the reader - its pretty straight forward just doing the operations in reverse. The kodak set is great, but I needed some higher resolution versions of them for some testing that hopefully was more representative regarding compression than a straight up bilinear interpolation - so I ran it through my super-resolution NN and got some 2x outputs. I figure this would probably be useful to others as well, so I'm posting the data set here for you!
Oodle Texture is a new technology we've developed at RAD Game Tools which promises to dramatically shrink game sizes, reducing what you need to download and store on disk, and speeding up load times even more. Oodle Texture is specialized for what are called "block compressed textures". These are a form of compressed image data that is used by GPUs to provide the rendering attributes for surfaces in games. Oodle Texture works on BC1-BC7 textures, sometimes called "BCN textures". The BC1-7 are seven slightly different GPU formats for different bit depths and content types, and most games use a mix of different BCN formats for their textures. There are normal non-RDO encoders which are very good maximum quality encoders, along with a RDO (Rate-Distortion-Optimization) which can allow your textures to compress further with an additional compressor such as Oodle Kraken or Zip while still maintaining extremely high quality. In this post, I want to primarily cover the BC6H quality of our non-RDO maximum quality encoders compared to a commonly used alternative. First though, what is BC6H? BC6H is a 3-channel (RGB) half-float texture format. It turns out that BC6H is the same size as BC7, even though BC7 compresses only 8-bit data while BC6H compresses 16-bit floating point data. The magic that makes this possible is in the details of how it encodes the texture. There are two formats to BC6H, a signed format and an unsigned format. This does matter as the "half-floats" are encoded differently for each. In the unsigned format, the half-float has a precision of 5 bits in the exponent and 11 bits in the mantissa where as the signed format as 1 bit specifying positive or negative, 5 bits of exponent and only 10 bits of mantissa. Thus if your data is always >= 0, you should probably use the unsigned format as you will get better quality out of it. In the typical use cases of BC6H that I am aware of, the data is typically >= 0. Like all other BCn formats, each texture is broken up into 4x4 blocks and each block for BC6H is encoded in such a way where there are multiple possible encoding modes per block. The encoding modes, of which there are 14 different possible encoding modes, primarily specify the dynamic range (that is the minimum and maximum value of all pixels in a block) and the precision of the block in different possible ways. While some of the modes can cover the entire possible range of a 16-bit half float (at reduced quantized encoding precision), most of them are delta encodings, where you have a base color in the dynamic range and the rest of the colors are offsets from that base color. The colors themselves which are used specify non-linear lines through the color space for each channel. Its non-linear because its specifying them in the integer values of a half float and these integer values are interpolated directly. IE when you interpolate the integer value of a half-float, you get a non-linear distribution of colors along that line. (I hope that's clear... it is kind of confusing). It gets even more complicated and for more information on the specifics see https://docs.microsoft.com/en-us/windows/win32/direct3d11/bc6h-format Sufficed to say, encoding these things optimally is highly non-trivial. The search space is enormous, and even the choice of how you measure what is good or not is also fairly ill-defined for HDR textures. The reason this is is because if you just use straight up Squared-Error it will cause errors in bright spots to over-whelm any of the surrounding data prioritizing getting those just right, while your visual system in your eye is essentially logarithmic in intensity response -- meaning the brighter the values the less you see the small differences -- thus Squared-Error really messes up the colors on the edges of bright objects as it thinks those bright errors are just as important as the darker errors (which is not the case). Your choice in measuring error in BC6H is thus very important. We spent a lot of time nailing that down, and it really shows in the quality of results. This is my favorite example showing off the quality of Oodle Texture.  Source Data (Ground Truth) 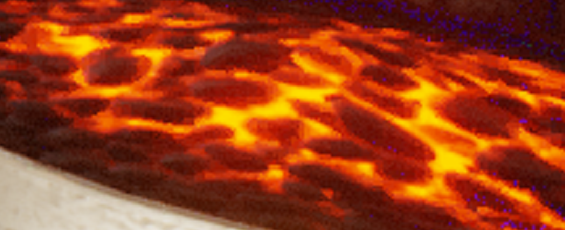 Common BC6H alternative encoder with max quality setting  Oodle Texture non-RDO maximum quality encoding Additionally, you can do what is called Rate-Distortion Optimization (RDO) which will make smarter encoding choices for a very large gain in compressibility of the data. More on that in a future post. Charles has a really nice write-up of our RDO encoders here: https://cbloomrants.blogspot.com/2020/06/oodle-texture-slashes-game-sizes.html (Seriously, go read that then come back) The original maximum quality DDS texture there can only be compressed by 2%! Here's the compression ratio table made from various lambda RDO values...
Oodle Texture non-RDO  Oodle Texture RDO lambda=10  Oodle Texture RDO lambda=30  Oodle Texture RDO lambda=40 While those look identical, I assure you there are very subtle differences - but those mostly imperceptible differences make all the difference between no compression and 1.71:1 compression.
You can read more about Oodle Texture at the RAD Game Tools web site, along with the rest of the Oodle family of data compression solutions. 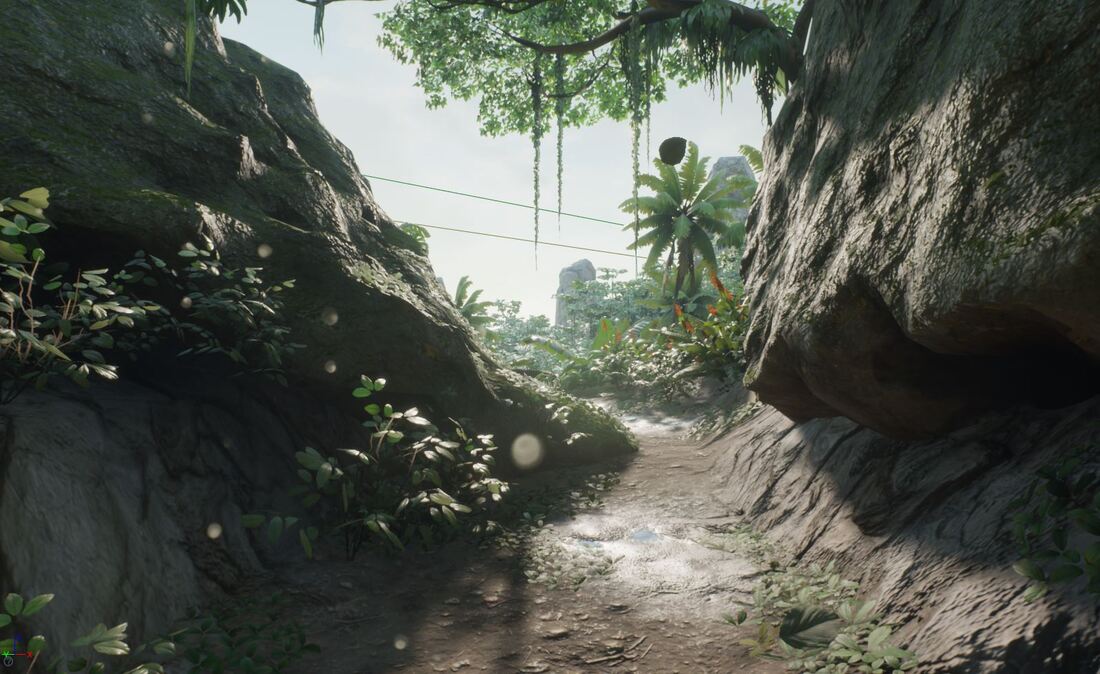 I spent some time recently determining the effect of Oodle on UE4 Load Time for various theoretical disk speeds. The Oodle compressors can speed up load time in two different ways : one because they decompress faster, taking less CPU time for decompression, second by making the data smaller, which saves IO time. When disk speeds are slow, smaller files that save IO time are the primary benefit. When disk speeds are very fast, using less CPU time for decompression is the main factor. First, I patched the UE4 source to limit the cores to less than the system to something more reasonable. I then patched the source to artificially limit the disk IO speed to something specific. The data itself was loaded from a PCIE-4 SSD - so very very fast and needed to be artificially limited to reflect the typical performance of say a blu-ray or PS4/XB1 HDD. Of note, I did not emulate seek time, so the seek time is assumed to be basically instant - so YMMV. Also, real world load times will also be affected by things like disk cache, so we get more useful measurements by simulating disk speed. Loading in UE4 is the sum of the time taken to load from disk and the time to decompress that data plus overhead time for level loading that's not directly in IO or decompression. Though depending on how many cores are available this loading from disk and decompressing the data itself can sometimes be done in parallel - for the purposes of these tests that was minimized through core affinity settings and mutexes. What are we comparing? ZLib and Oodle. If you enable compression for pak files in Unreal, software zlib is used by default. Oodle provides a plugin that drops in and changes the pak file compression. Mostly we care about Oodle's Kraken encoder as it has very desirable perf for compression ratio, but I included the others (Selkie, Mermaid, Leviathan, Hydra) as well in my testing. The time we are measuring here is three things. 1) We want to know time to first frame. 2) We want to know how much time total was spent decoding. 3) We want to know how much time total was spent loading from disk. #1 is the most important overall score, but #2 and #3 inform us about how much we can gain from the different options of Oodle Compressors and which one we should use specifically. How fast is the PS4/XB1 HDD? About 65-80 MB/s typical. How fast is a Blue-ray? About 10-20 MB/s (though seek times are horrendous) How did I measure time to first frame? With RAD Telemetry of course! :) (Seriously invaluable tool if you aren't familiar) How much data are we loading to get to first frame? ZLib: ~105 MB Kraken: ~86 MB Kraken has less data to load because of higher compression ratio. First up, just Zlib and Oodle time to first frame...
The time it takes to do just the decompression part (not counting disk speed - just decompression time) is also pretty interesting.
ZLib: 3.88 seconds Kraken: 1.39 seconds The other Oodle formats here are as follows with regards to decompression time... Selkie: 0.24 seconds Mermaid: 0.64 seconds Leviathan: 1.82 seconds Hydra: 1 second ^^ you heard that right. Even Leviathan, Oodle's LZMA like compression ratio is over twice as fast as Zlib here... In isolation Leviathan can decode 3X faster than Zlib, here we're timing not in an ideal benchmark, but in the actual usage in Unreal, where sometimes the buffers compressed are small and the overhead means we don't reach the full speeds Oodle is capable of. The disk io time is (when measured) basically equivalent to the time to first frame - the decompression time + a second or two depending on how many cores you have working. In conclusion, Oodle does make a meaningful impact on load times - This is extremely so for lower end devices which have fewer cores and also on systems with HDDs which are typical for PC & Current Gen console games. Presumably the Nintendo Switch will also benefit greatly from Oodle as well since the game data is loaded on a sdcard and those come in various speeds (sometimes really really slow). For more information on Oodle visit http://www.radgametools.com/oodle.htm Trying out a new series of blog posts where I talk about different things that I found on github that I think others might also find interesting/useful. This being the first post in the series. This may also be the last post in the series... who knows!
First up, ray-tracers built in a bunch of different languages - profiled and compared. https://github.com/athas/raytracers I found this one somewhat interesting cause it had language choices which I was not familiar with. Though it missed some other obvious (to me) language choices of course - like straight up C and/or C++. Note that I am in no way saying this guy who wrote this code does so in every language well for speed or clarity - so don't consider this an endorsement or anything ;). Perhaps not surprisingly, of the languages they chose to implement Rust came out on top. Rust being a systems language made for performance similar to C, this was kind of expected. Still, its interesting to check out Haskell and a few other uncommon language choices in there. I have a weird fondness for Ocaml, in that I like to look at it from afar, but have never actually used it in a real project yet (I doubt I will) and I thought it was an odd choice to put in this comparison - but maybe not! The implementation in Ocaml looks rather simple, but it usually kinda does which is why I like the language. Second, there is a database here of Covid-19 chest xrays. https://github.com/ieee8023/covid-chestxray-dataset This could perhaps be used by some DNNs to train for detecting the disease - so perhaps useful for anybody who is interested in using machine learning to help with this disease. Third, if you spend a lot of time in linux - this breakdown of the command line has some pretty neat things in here - some of which I knew and some of which I did not. https://github.com/jlevy/the-art-of-command-line Fourth, a paper repository. If you are looking for something specific, or just want to learn something new, this might be a good place to start! https://github.com/papers-we-love/papers-we-love Fifth, power toys from Microsoft. In this repo is a bunch of handy utilities to make your development life just a little bit easier. From right-click image resizing, to batch renaming, to new file types supported in the explorer preview pane and more... https://github.com/microsoft/PowerToys That's all for now! Stay safe and Enjoy! |
Archives
November 2021
Categories |
||||||||||||||||||||||||||||||||||||||
 RSS Feed